Monday, 22 April 2013

Dead easy frozen berry yoghurt

My Matey likes a pud after dinner. It doesn't have to be big but just a little something. Usually the request is met with slightly helpless we-don't-have-anything from me followed by a trip to the satsumas in the fridge from him. This weekend though I was inspired by I-don't-know-what to make up a frozen yoghurt pud with some frozen berries that were in the freezer and a pot of yoghurt that needed eating. Entirely made up on the spot but very successful and easy. Most importantly it doesn't need an ice-cream maker.


Ingredients to serve 4-5
500g pot of natural yoghurt
4 handfuls of frozen berries (most supermarkets sell bags of frozen fruit and they are really handy to have in the freezer.)
Sugar (or honey) to taste

Method

1. Put the pot of yoghurt in the freezer for a few hours. When it is fairly frozen but still a little squishy it is ready to blend.

2. Take the berries out 10 minutes before you are ready to blend with the yoghurt. This isn't essential but it does give the blender a bit of a chance as the berries can be rock hard.

3. Put the almost frozen yoghurt into a blender and add the four handfuls of berries. (I have quite small hands so adjust this to your taste.) Add around two tablespoons of sugar. You shouldn't need more than this but don't be tempted to avoid it as the mix is very mouth-puckering without a little sugar.

4. When everything is nicely blended together put it all into a container and return to the freezer for about 45 minutes to allow it all to firm up nicely. (It can be eaten right away but it hasn't got that satisfying ice-cream like texture.)

This is a pud to eat on the day, because it hasn't been churned in an ice-cream maker. If you save some for the next day it will go rock hard. This can be salvaged by letting it melt a bit and giving it a bit of a whizz in the blender. I think it is the perfect thing for a dinner party as it can be made before people arrive and left in the freezer to firm up in time for dessert.

Thursday, 18 April 2013

Leek potato cakes with smoked mackerel and horseradish mayonnaise

This post came about because I was fed up with  trying to make potato cakes only have them disintegrate in the frying pan. Much googling about how to avoid this mush resulted in nothing useful and a vague idea that adding egg might work. (It probably does but I think it would alter the whole nature of the cake.) Last night I was about to reach for the usual slosh of milk to aid with the mashing of the potato when it occurred to me that the milk might be the problem. Perhaps the milk is breaking down the potato too far producing lovely smooth mash but sloppy potato cakes. So went without any liquid and I can honestly say that this was the first time ever that my potato cakes looked like summat off the telly.

So! Here we go. Leek potato cakes with smoked mackerel and horseradish mayonnaise


Ingredients
Potatoes - I reckon on using one good-sized one per person.
Leeks - Again it depends on the size of the leek but one per person is about right
Butter
Seasoning
Smoked Mackerel
Mayonnaise
Horseradish - I used creamed from a jar!

Method

1. Peel and boil the potatoes until they are soft but not falling to bits then mash them as smooth as you can with a knob of butter and salt and pepper.
2. Chop the leeks and gently fry them with a splash of water and a little butter. When they are soft and the water has evaporated this is the point to remove them and add to the mash. Mix thoroughly.
3. Make two potato cakes per person and fry in a hot frying pan with a little olive oil till both sides are brown and crunchy.

Top Tip: It is a LOT easier to make the potato cake after the mix has cooled. Yes this is partly because it isn't hot (!) but they seem to hold together better when cool.

4. While the cakes are sizzling nicely put a dollop per person of mayonnaise in a bowl and stir in as much horseradish as you dare. (This really is a personal taste thing. I go for a teaspoon for two people but I am a wuss when it comes to hot things.) Add some seasoning and mix it all in well.
5. Put the browned cakes on to plates and add the fish to the hot pan to give them a little crunch. (You can serve them cold.)
6. Add the fish to the plates with a dollop of the horseradish mayonnaise.

Simple and yummy.

My only addition for the future would be a bit of watercress to make the plate look a bit less brown and add a fresh green tang to the dish.


Monday, 15 April 2013

Lemon drizzle cake

 My friend Tina of Tobyboo was doing a pop up shop in Clerkenwell this week so in the interests of doing my bit I decided to bring cake to keep the spirits up and put an end of the week spring in the step. So I plumped for a spring time favourite of Lemon Drizzle cake. (See what I did there!)


You will note that I have suddenly used ounces instead of grams. It's how I remember this all-purpose-been-around-forever recipe for a basic sponge to be flavoured however you please. 2 eggs to 4oz each of flour, sugar and butter. (In the interests of clarity though, 4oz is the less easy to remember 114g.)

Ingredients

Cake
2 eggs
4oz  Flour
4oz Sugar
4oz  Butter (I use salted and don't add the customary pinch of salt.)
4 Lemons (This is possibly one of my least thrifty recipes but I like a lemon cake to taste lemony. Adjust to personal taste and the size of the lemons!)

Top Tip: If you are using a lemon for cooking zest it first and freeze the zest for using later. It makes a recipe like this a lot more economical.

Icing
1 lemon
50g Icing sugar
Sugar
Water

Method

Cake
1. Heat the oven to180C/350F/Gas 4 and grease the tin you plan to use. (I went for a loaf tin because I like a loaf cake and it's easier to transport than a round cake.)
2. Finely grate the zest off 4 of the lemons and put aside.
3. Cream together the sugar and butter until it looks light and fluffy.
4. Beat the eggs and mix into the sugar and butter.
5. Add the flour (sieving it is worthwhile but not vital) and mix in.
6. The mix should drop off of the spoon/mixer. If it doesn't add a splash of milk.
7. Add the lemon zest.
8. Resist the urge to eat the lot now and put the mix into the tin and in the oven for 20-25 minutes. (When a skewer/knife/pointed implement comes out of the cake clean it's ready.)
9. Leave aside to cool.

Icing
1. Carefully peel the zest off the lemon with a lemon peeler. You need to avoid the white, bitter pith. Cut it into thin strips.
2. Put about 2 cm of water into a small saucepan and add 3 tablespoons of white sugar. Heat the water and sugar until it boils, keep stirring it, then add the  lemon zest. (Maintain the heat but make sure the sugar syrup doesn't burn.) When the zest starts to look transparent and sugary take it out using a slotted spoon and leave it too cool on a dish.

Top Tip: Making this over the weekend I decided to drizzle the  lemony sugar syrup over the cake before icing it. Very successful. It gave a slightly crunchy layer. Yes it is naughty but it is cake after all!

3.Squeeze the juice out of the lemon. Run the juice through a tea strainer to make sure it is totally clear of bits. (Not essential if you don't have a tea strainer.)
4. Put the icing in a bowl and add the lemon juice slowly while mixing the icing. When the icing is thin enough to be slightly runny but thick enough to stay on the cake start drizzling. (I find that carefully spreading it with my fingers gives me more control over where it drizzles.)


7. After the icing has started to set and isn't drizzling everywhere arrange the peel in a random pretty pattern on the cake.

Top Tip: The sugary pan will be a pain to clean. Fill it with water and boil. This will dissolve the sugar and make cleaning it a lot less painful.

Eat with plenty of tea and chat.

Friday, 12 April 2013

Until I get rich.....

.....I hate cleaning. I would love a cleaner but I can't have one. (I've come to the conclusion that the only way to be a domestic goddess is to have staff.) While I am very good at day to day tidying and keeping things looking ok on the surface please never open a cupboard in my house. Once a month I have to admit that the cursory odd hoover round and wipe down just won't cut it and I actually have to do some work. (If am brutally honest I like having guests because it forces me to clean the house and takes some of the pain away.)

When I do finally knuckle down to it white vinegar and bicarbonate of soda are my cleaning friends. Cheap, (Savers sell both for £1 each for a good quantity. Don't use it for cooking though!) smells better than most other cleaners, isn't as toxic as most commercial products, you don't need to have loads of different products for different purposes AND it works really fast.


Spray a bit of vinegar on any dirty surface (except marble or stone), sprinkle some bicarb on it, enjoy the fizzing action and start scrubbing. Seriously you will be amazed at how clean it gets things.

Blocked sink? First try pouring boiling water down it. If that doesn't work put as much bicarb as you can down the plughole, pour the vinegar down. Enjoy the mad fizzing, (Stop laughing at me, you'll enjoy it too.) you might as well clean the sink while you are at it. After an hour pour more boiling water down the sink and voila!

My favourite thing to clean this way is taps. They get satisfyingly shiny. It is easier to make a paste with the bicarb and a little vinegar and apply with a toothbrush to get into the nooks and crannys. BUT the real magic is if you want to shift the limescale that is caked on underneath the tap. Soak a sheet of kitchen towel with vinegar and wrap it round the limescally part. Wrap clingfilm round the whole lot to hold it in place and leave for a few hours. When you come back you will still have to scrub a bit but it will shift. Some times you may need to get a blunt edge (I use an old table knife) and carefully scrape the limescale off. It will come off easily as it has been loosened by the vinegar soak.

There are many uses for these two cleaning essentials but these are the ones that I find definitely always work and make the dull but necessary job a lot faster so you can dance off to the rest of the weekend for fun.

One final  Top Tip: If you have any lemons going a bit off in the fridge you can use them mixed in with the vinegar. It smells citrus fresh!

Monday, 8 April 2013

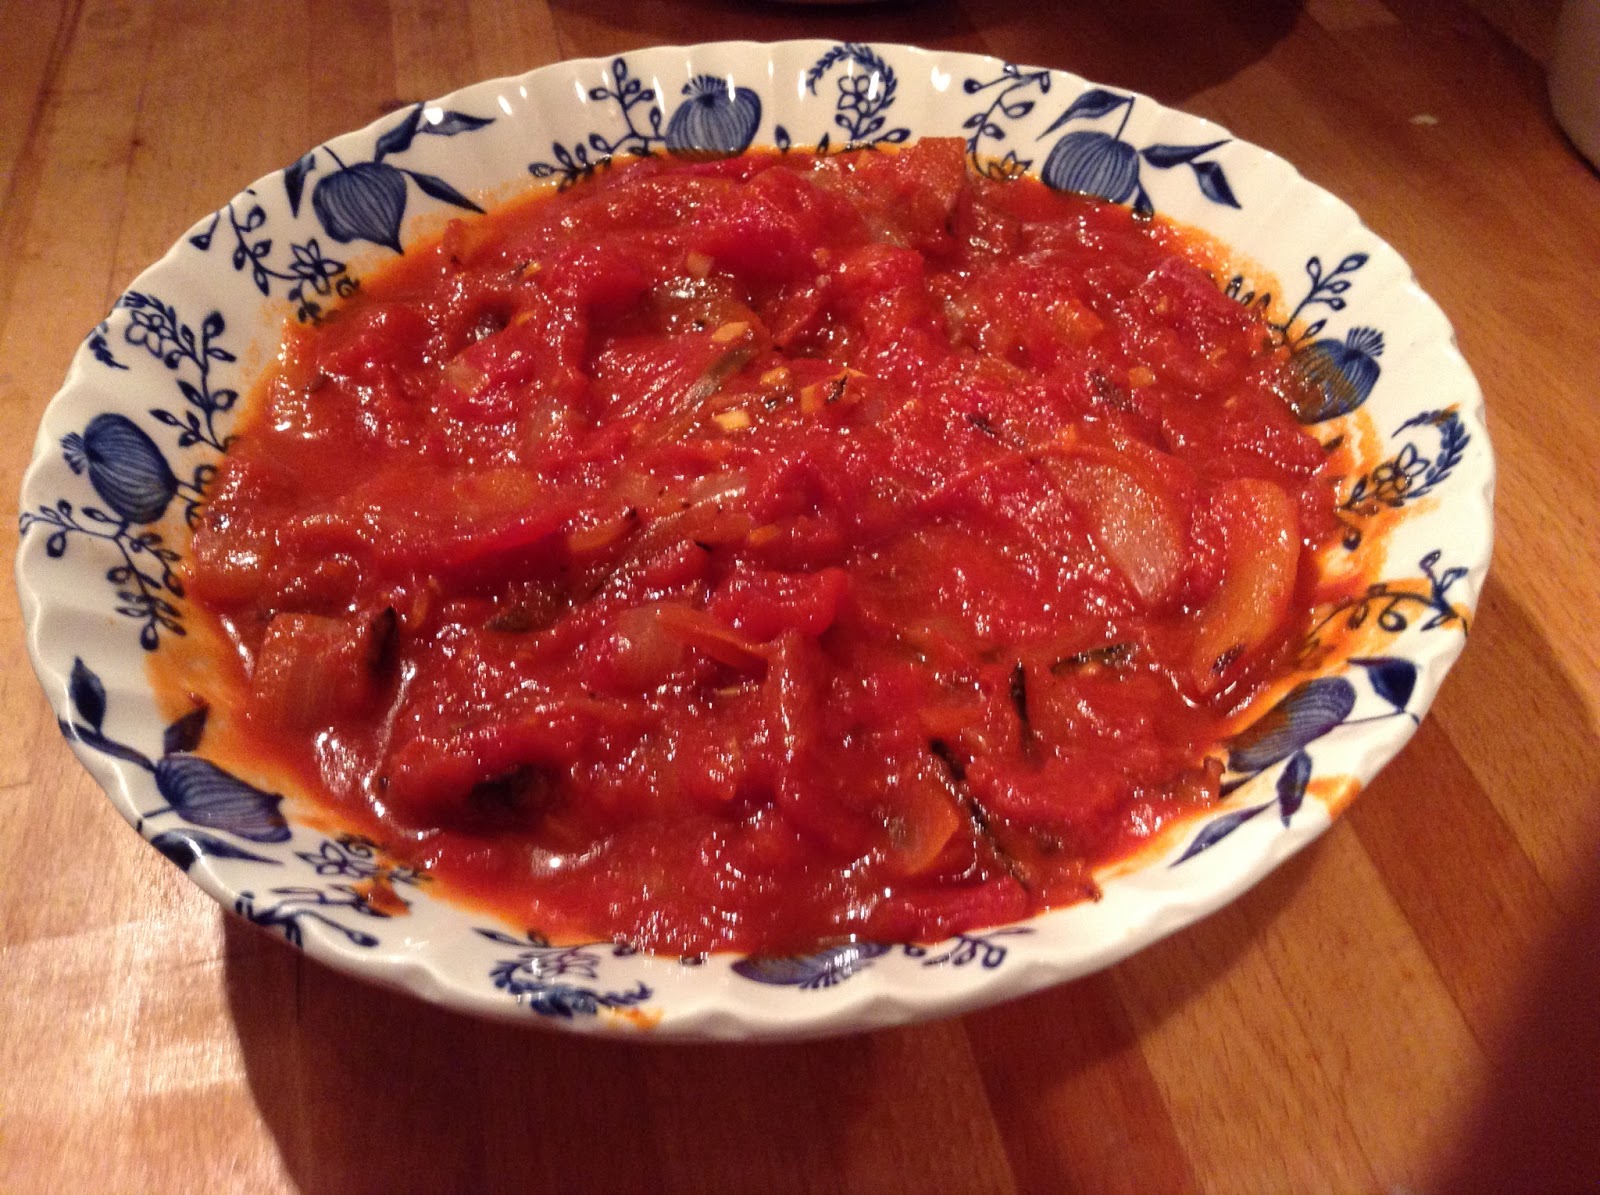
The simplest of Tomato Sauces

Some time ago I realised that I spend a huge amount of time trying to put together a decent tomato sauce. Be it a quick leftovers pasta dinner, a proper spag bol or my very non-Italian lasagne a good tomato sauce is mandatory. Sometimes my stabs at it have worked beautifully sometimes not.

A lot of rummaging around recipes came up with hundreds of 'basic tomato sauce' recipes that were clearly fabulous but immensely time consuming and impractical to throw together at the end of the day. The other night however I was putting together leftovers in the truest tradition of there-is-nothing-to-eat-in-the-house and came up with this concoction.


If I'm really honest it isn't a sauce so much as a cross between sauce and a casserole. It is however the perfect base for most tomatoey dinners. After a few more goes (we've all cooked something amazing with leftovers and never managed it again) and I think it's is pretty good staple and perfect to be made in vast quantities for freezing. This is enough for 4 sturdy portions

Ingredients
Two tins of Chopped tomatoes
2-3 cloves of Garlic (adjust to taste!)
Two onions
Olive oil
Seasoning
Bay leaves (not essential but very good)

Method
1. Chop the onion, no need to be too careful this is rustic!
2. Heat the oil in a pan and add the onions. Keep stirring until they are softening.
3. Finely chop the garlic and add to the onions. Keep stirring until everything is golden brown then add the tins of tomato and a good squeeze of tomato paste.
4. Add seasoning and bay leaves and simmer gently for about half an hour until it it looks like a thick and juicy sauce.

I quite like it chunky but if you are looking for a smooth sauce give it a quick whizz in a blender and voila!

From here the world is your tomato. I've added red pepper at the frying onion stage, red wine if there is leftover glass looking for a home, bacon.....have a look in the fridge.

Last time we paired it with meatballs and pasta. A nice sprinkling of cheese on top and there is one hearty dinner with plenty left over for lunch. (It actually tastes better the next day. All the more reason to make loads for freezing.)

Top Tip: Half cook some pasta and add some sauce for re-heating in the microwave at work. By half cooking the pasta it won't go soggy and horrible in the reheating process.

Friday, 5 April 2013

Letter bunting for presents


As my Matey works in chocolate I am rather spoilt when it comes to Easter eggs. This pretty thing was this years present.


Too pretty to eat really.....until last night when it was destroyed and scoffed with great pleasure.(I think that the snowflakes are meant to be daisies but this year snow does seem more accurate.)

The trouble with a Matey who works in chocolate is that a Smarties egg just won't cut it. To be honest most chocolate won't come close to the stuff he is surrounded by each day so each Easter I have to come up with something innovative. This year there was only one thing that felt right:


Ahem. Private joke. I can't explain it because you'll think I'm bonkers.

I adore wrapping presents. Few things are nicer than making a present look enticing while imagining the recipients face when getting it. Currently I have bit of a thing about decorating a simply wrapped parcel with cut out bunting of letters in jolly colours. It looks fabulous and as though it took ages but it really doesn't and is a pleasant task to do while watching the tellybox.

Tools
Computer with Word or Publisher
Printer
Card
Scissors
Thick but pointy needle
String or embroidery thread

Method

1. Create your letters in Word or Publisher. I like to use the Word Art function in Publisher as I find it gives me more control over size and colours. Once you have the letters right choose which colours you want and fill in both the body and the lines of the letters. 

Top Tip: If you want each letter to be a different colour you will need to have a text box for each letter.

2. Print onto the card.

3. Cut out the letters. Nail scissors or a scalpel can be handy for the fiddly bits.

4. Using the needle make two holes on either side of the letter. You can use one hole but I find the letters hang better with two. Gently pull the needle all the way through the card. Giving the needle a little twist as you go helps with this.

5. Thread the needle with the string or embroidery thread and string the letters together.

6. Stick one end of the thread to the back of the present. take the other end and gently pull it taut before sticking it down. Adjust the letters to look splendid and wait to see the lucky person who is getting it.


Thursday, 4 April 2013

Easter is over!

Golly! It's been a week since my last post. I've been on happy, happy holiday and I've been awfully busy celebrating so there hasn't been much time to sit down to type much.

Much chocolate has been scoffed and Spring has truly Sprung. I know the weather is yet to realise this but the clocks going forward makes all the difference to my cycle home.

Having taken a few days off post Easter my Matey and I went to the Doctors, Dissection and Resurrection Men exhibition at The Museum of London . It's only on for another week and a half but I would highly recommend it as I came out having definitely learnt stuff and pondering the continuing and controversial issue of the need for donor bodies for Medical Science to grow.


I often don't go to exhibitions that are ticketed at museums in London. I feel that the whole of museum is free so why do I need to pay for a small exhibition when I can occupy a day in the main part. However when I do fork out I always realise that it is often easier to really learn something from a small and well curated exhibition that focuses in on a subject. Wandering round a vast museum it is easy to learn nothing at all despite being surrounded by fascinating objects.

I did finally get on with a very small project I have been meaning to do for sometime now. (Why is it that the small tasks are always neglected.) The recycling system has changed in our area so we now have plastic bags to put it all in. The only problem being that the bags go everywhere and with a small kitchen it's hard to fit things in anyway without a sprinkling of green bags everywhere. Simple solution. A bag stuffer! This was one of those things I always thought was a bit naff and too cute for me. Until I was given one for plastic shopping bags and discovered that they do the job very well. Time to make a new one for the recycling bags.

This is a truly easy job and takes about half an hour.

1. You need to cut out a rectangle of fabric for the main body and a strip of fabric for the handle.
 

2. Iron both strips in half and sew along the long edge to make two tubes of fabric. (It is worth ironing the seams open at this point for a nice finish.)

3. Turn the strip for the handle inside out and iron.

4. Fold the two ends of the main body tube over twice so that you have a hem that is wide enough to feed some elastic through.

5. Sew the bottom hem leaving a small gap, around 1cm, for the elastic to feed through. I always double stitch around the gap to make sure it is really secure.

6. The top hem needs the two ends of the handle inserted under it and folded back up to keep it hanging nicely (see the photo below). Stitch the top hem in exactly the same way and stitch the top of the hem where the handle is.


7. Using a safety pin as a needle feed the elastic through the gaps at the top and bottom, decide on the best tension for you to be able to get the bags in and out and tie a knot.


8. Trim any loose threads and stuff with plastic bags.


Told you it was quick and easy! Free as well if you use leftover bits and bobs.
Related Posts Plugin for WordPress, Blogger...
UA-38463267-1