Friday 20 December 2013

Gingerbread Men

It's hard to not love a gingerbread man isn't it? Forget the whole Christmasy thing. If you are given a gingerbread man you really do have to smile. There are many, many types of gingerbread but this one (stolen from somewhere and I have no idea where) has magical properties as it keeps the form of the imprint from the mold as it bakes. It also gets smoother and bakes better the more you play with it so is ideal for sproglets to have fun with. (To state the bloomin' obvious this recipe gets very hot indeed. Melted treacle doesn't mix well with little fingers and noses so wait till the dough is cool.)   Scared to fiddle  too much with the original recipe I have only upped the spice content a little and added my top Christmas spice clove.

Gingerbreadmen
350g  Treacle
225g Butter
175g dark brown sugar (the darker the better in my book!)
750g Plain flour
3 tsp Ground ginger
2 tsp Mixed spice
1 tsp Ground Clove
1/4 tsp Salt
1 Large egg

Method
1. Heat the treacle in a large saucepan. When it is runny take off the heat and stir in the butter and brown sugar until they are well combined. You may need to add a little more heat. Set aside to cool. If you have a mixer put it in the bowl ready for the mixing stage.
2. Sift the flour, salt and spices in a bowl and mix together.
3. Add a tablespoon of the floury mix to the sugar and butter and stir in. Keep doing this for 2/3rds of the flour.
4. Add the egg and mix in then add the rest of the flour and mix till it is a smooth brown dough.
5. Allow to cool. Do not miss this step the dough is impossible to work with until it is cold.
6. Turn the oven on to 350C.
7. Roll out the dough and have fun with cutters or treat it like playdoh.
8. Place the gingerbread on greased baking trays and bake for  10-15 minutes.
9. When they come out of the oven allow the biscuits to cool on the tray for a few minutes. This is essential as they fall to bits otherwise.

DECORATING TIME.....or eating with a nice cuppa.


Inevitably some come out as planned.....


Some do not.....but look how HAPPY he is!

Wednesday 18 December 2013

And the chair is done

The trouble with embarking on a massive project is that it is all consuming but not terribly interesting until it is done. I say it is not very interesting but it is FASCINATING to yourself but at best mildly diverting and at worse deadly dull to everybody else.

So here we go. A brief summary of the chair.


I stripped it right back to the bare bones while watching several episodes of Poirot. A truly messy job, the floor was revolting afterwards. No lost Faberge eggs but we did find an old penny which is always nice.

Unfortunately the stripping back revealed that the springs needed to be replaced. I had not bargained on this. I did not have a clue how to tackle this but having announced to the world my intentions to do this thing I could hardly wimp out now.


Doing the webbing is easy and rather pleasing as it's just a matter of weaving the jute tape in and out and making it really tight with a stretcher. There is something very appealing about making it tight as a drum and even though it is the easy bit it feels like being a pro.


And so to the springs. I nearly gave up at this point. Much staring at the thing didn't help. After a few stabs at it the task seemed impossible. I knew what I wanted to do. I had the theory down in my head but they just wouldn't behave. Finally I found this lesson which made it all a lot clearer: http://www.youtube.com/watch?v=29zPNvL48_4


This was the point at which the chair was most beautiful in my eyes.


A bit of fresh padding and it was time ready to make it pretty. Much pondering forced me to relinquish the idea of a fabulous bright blue or an exciting pattern. I reluctantly admitted that we have exciting cushions already and it would all be too much to add yet more pattern. In the end a nice mossy green old velvet curtain was purchased, washed and chopped up.


My nailwork leaves much to be desired but I think it looks rather splendid and it takes up a fraction of the space the old chair did while still having the same amount of bum room. Two weeks after completion and it is still holding together. The springs have not sprung off and it is actually rather comfy.

Now this was to be my last bit of upholstery but the trouble is that it is really rather addictive taking a chair fit for the dump and making it work again. Fortunately I recognise that there really is nowhere to put anything new in the house but it's only a matter of time.....

Wednesday 11 December 2013

Smoking Bishop - the ONLY mulled wine worth bothering with.

I adore mulled wine. I really, really do. So much so that I am incredibly picky about it. Don't like the type made with a nasty syrup, almost always too sweet and synthetic tasting. It's rare that the type found in Christmassy markets is worth the anticipation. Only one thing for it. Make it!

Smoking Bishop is my family's choice. Or to be specific my Mum and I make it each year while my dad says that he doesn't like mulled wine. A traditional recipe featured in 'A Christmas Carol'  (and you can't get more Christmassy than that) it has more than one variation floating around the web.

This is so successful that we have been known to run out of it at parties because nobody wants to drink the other choices. The announcement that the last jugful is nigh has been known to cause near accidents. I planned to take a lovely photo of the batch I made for a party last weekend as I thought I had made far too much. Turns out not a drop was left to lake a snap of the next morning. I could cheat and take a photo of a glass of wine but that's not the point is it? So here is Scrooge and Cratchit settling down for the evening with a frankly obscenely large bowl of the stuff.


Less sweet than most mulled wines (although you can add more sugar if you wish) it is reliant on just one spice, the clove, to give it the flavour of Christmas.

Smoking Bishop
6 Oranges
2 Grapefruit
120g white sugar (I use sugar which has had a vanilla pod in it for a bit.)
3 Bottles red wine
1 Bottle ruby port
48 + Cloves

Method
1. Turn the oven up as high as it will go and pop the fruit in on a baking tray until they are starting to brown.
2. Stud the fruit with 6 - 8 cloves apiece (you will find it easier if you have poked a hole with a skewer first) and into a large pot with the red wine. Leave to mull overnight.
3. In the morning fish the well pondered fruit out of the wine and squeeze all the juice out into the pot.
4. Add the port and sugar.  Stir well.
5. Heat till warm and taste. Add more sugar if it is a little bitter for your taste.
6. Serve. Be careful to not let it boil. It's not romantic but I find that reheating it one jug at time in the microwave for around 2 minutes is a lot safer at parties.

In the unlikely event of  having some left it stores beautifully in a old wine/port bottle. (Don't throw the empty bottles away until you know whether you need them.)  I have no idea how long it will last for but I have happily drunk a year old batch to no ill effects.

Friday 8 November 2013

Sloe Whisky

My Matey and I had a day trip out of London to pick up some chandeliers (as you do) and decided that we would go for a good tramp around a hunting forest. Gloriously autumnal day, mild concern about the freely wandering bulls and this little lot:
 

Thousands! Not having planned this we were not equipped with a handy plastic bag. However with a used coffee cup and a crumpled paper bag we picked enough to make one bottle of Sloe Whisky. "Whisky!" I hear you cry "Don't you mean Gin?" Nope! While on happy holiday we came across these chaps at the York Food Festival: http://www.sloemotion.com/sloe-whisky.html. After loitering around the stand for just a bit too long we reluctantly decided we didn't NEED to buy any REALLY.


This recipe is an intelligent (or so I fondly imagine) amalgamation of previous Sloe Gin making and several internet recipes.

Ingredients
1 bottle whisky (70cl)
400g sloes
110g sugar

Method
1. Wash your sloes and destalk and deleaf them.
2. Put them in the freezer. The traditional method is to prick them all over with a needle. Life is too short and freezing them has the same effect.
3. Defrost the sloes then put in a bottle/jar with the sugar. Pour the whiskey over.
4. Put in a dark cupboard and shake it upon occasion.
5. After 3 months strain the sloes out and bottle the whisky. Have a wee dram then put it somewhere out of temptations way ready for next Christmas.


Thursday 31 October 2013

Time for a change

Since 2009 I have been working terribly hard on my little business Crumpet & Skirt a glamorous range of gifts and homeware depicting saucy (but not rude) 50's pin ups. Late 2011 I realised that I was a bit stuck and wanted to do other things so I changed the name to Mountain & Molehill and started to work with other designers.

On Valentines Day realised I was miserable. Things just were not going according to plan. I STILL couldn't afford to make anything new and both I and my buyers were bored of the old stock. Factoring in some very positive changes at home and few weeks later I decided that the only thing to do was to let it all go. 

This was somewhat sad and scary. What was I going to do instead? Was I really going to throw away four years of hard work? Of course making such a decision doesn't mean that things are instantly over. I had old stock to sell for a start. In this interim I toyed with hundreds of what to do next ideas and realised that none would be really satisfying or make enough money to do anything with. There is a brick wall for designers in which after a certain level of success, and I am including selling to major high street shops here, you just can't make the next step to make it pay you properly without a large injection of money and I mean a lot of money.

So what to do then? Eventually an idea to make an over-ambitious applique Noah's Ark wall hanging, and the realisation that there was no way I could produce what was in my head, evolved into this Alphabet Parade of Animals:


Clearly the next logical step was Personalised Name Parades:


Not wishing to just appeal to parents and children I resolved to produce some more grown up parades. My current favorite was actually my Matey's idea. A Stag Night parade:


All printed to order at home on a massive professional printer paid for by the sale of the old stock and hand-finished with a 24ct gold crown. Tah Dah!

Thursday 24 October 2013

Bangers in a Beany Tomato Sauce

Aside from having to resist the urge to mutter something about mists and mellow fruitfulness I rather like this stage of Autumn. It's still warm and with plenty of layers it's fun to wrap up and do STUFF without wondering whether I'm going to freeze.

Not a fan of Halloween (neurosis that if the zombies don't get me then I'm going to be murdered by trick or treaters) but Bonfire night.....now you are talking. A whopping great fire, an anatomically odd guy and being wowed by fireworks. This has been known to be recreated with a candle, some sparklers and over performed oohs and aahs in the back garden.

Few things are more autumnal than beans and bangers and this recipe will make you forget that the summer is a whole year away. It 'ain't glamorous but it's hearty, warming and makes a pack of sausages go a lot further.


Ingredients to feed four
6 sausages chopped into 4-6 chunks
2 tins of chopped tomatoes
1 tin of mixed beans (I used biona beans because I think they are great! Don't use beans in a tomato sauce though I think the two tomato flavours taste odd and metallic)
1 chopped onion
1 large clove of garlic
Salt and pepper
Slug of red wine (not essential)

Method
1. Fry the chunks of sausage until they are brown and set aside.
2. Using the fat from the sausages fry the onion and garlic till brown then add the tomatoes, beans, seasoning and red wine.
3. Simmer until the excess liquid has been reduced by half. Then add the sausages and continue simmering until you have a thick slightly chunky tomatoey, beany sauce.

I chucked it on top of a  jacket potato but this is also splendid stirred in some pasta with plenty of cheese on top to make a quick supper. It is also brilliant to freeze so worth making loads if you are a super efficient mood one day.

Monday 21 October 2013

Possibly the daftest thing I have attempted to do yet.

Having bought this fabulous Conran sofa for a song back in March one rather major snag emerged. The armchair just looked old, saggy, lacking in style and frankly dirty. Even a throw can't hide this. Let's be honest about this. The moment a throw attaches itself permanently to a chair it is because the chair is dying. We are not talking about a cosy blanket over the back lending style and warmth. The presence of a throw is effectively a plea to guests to ignore the chair underneath.

Hunting down the perfect armchair proved out of our budget. "I know!" I thought merrily. "I'll just buy another lovely old chair and re-upholster it. I've done it before and it worked out ok.'

After much bidding on eBay and not winning we eventually won this:


A splendidly shaped chair I think you must agree. Not quite such a bargain as the 99p chair but at £51 not a totally daft buy either. However it will need a little more than a bit of TLC to sort it out:


I'm picking it up at the weekend and will have to decide whether the damaged panels (this is the worst) can be replaced or whether I'll have to start all over again. I fancy it would look quite smart in a darkish blue velvet..... it is easy isn't it? I am in possession of an optimistic amount of willpower.

Friday 11 October 2013

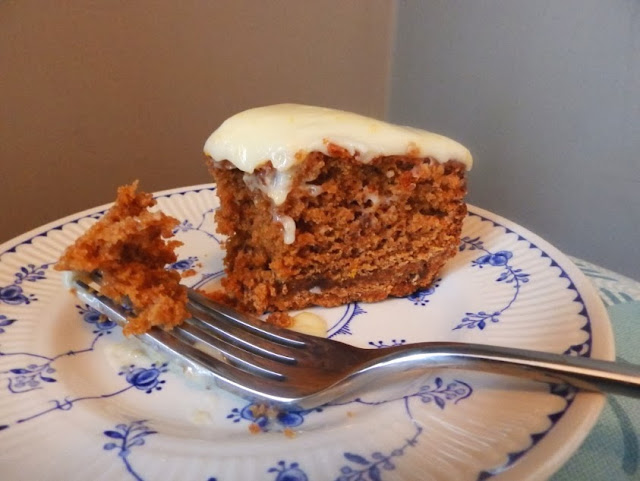
Nutmeg Cake with Citrus Cream Cheese Icing

A few months ago my matey's boss brought him a fresh nutmeg from Grenada. This is of course a truly wonderful thing, the only snag being that no occasion would be good enough to use it. Needing to say a big thank to somebody I decided it was time to use that nutmeg and bake a cake. Taking a recipe from ‘Best Recipes’ as a starting point I upped the flavour and added a cream cheese icing with a citrusy zing. I then discover that the recipient doesn’t like cake, spices or sugar..... Successful? She demanded the recipe and went straight out to get the ingredients.


This is glorious to make as it smells spicy and brown sugary but the thing that really makes this cake wonderful is the almost biscuity base which adds a bit of a crunch and a toffee like chew.

Nutmeg Cake with Citrus Cream Cheese Icing (makes a 23cm cake or a 16cm cake and 12 mini cakes)

Ingredients
473g self-raising flour
473g dark brown sugar – The darker the better as it adds a lot to the flavour and works well with spices.
125 g butter
2 teaspoons mixed spice
1 teaspoon baking powder
1 nutmeg or 2 teaspoons ground nutmeg
1 egg
237ml milk

Method
1. Heat the oven to 180°C and grease and line a cake tin(s). I made one small 16cm cake and 12 mini cakes for ....erm...tasting purposes.
2. Grate half the nutmeg and mix with the flour, sugar and mixed spice.
3. Rub the butter into the dry ingredient s with your fingers, until the mix looks like breadcrumbs
4. Spoon about half the dry mix into the cake tin(s). Spread it out but don't push it down like you would if it were a cheesecake.
5. Grate the other half of the nutmeg into another bowl, and whisk together with the egg and the milk, then add the baking powder. Pour into the remaining dry mixture and mix till smooth and runny.
9. Pour into the tin and bake for an hour. The mini cakes take 20 minutes.
10. Allow to cool in the tin. Don't be tempted to take it out until coolish as the base may well crumble.

It is pretty darn good like this but the orange cream cheese icing finishes it off nicely

Ingredients
100g cream cheese
250g icing sugar
Zest of 1 orange

Method
Mix till smooth and yummy. It will be a bit too runny at this stage so put it in the fridge while the cake cools. Spread roughly over cake so that it starts to drizzle a little down the sides in an Eat Me manner.

This actually tastes better the next day. The icing goes tangy and the base goes all biscuit like and wonderfully odd. It also freezes well so is perfect for cake related emergencies.


Tuesday 8 October 2013

Sausage, mushrooms and onion in cider

I could  wistfully go on about how autumnal and warming this is.....but in reality it came out of opening the fridge and realising all we had left was half a pack of sausages, some mushrooms and onions. Googling what could be done with such meagre rations I found a truly delicious sounding recipe for sausages with mushrooms and onions. Unfortunately I read on to discover that, while simple sounding, it had hundreds of other ingredients in it and took HOURS which made it useless as leftovers recipe.

The trouble was that I had decided it sounded good and I was getting hungry. So I ignored the recipe and made it up instead. It was great and, unlike most leftovers meals, it was an entirely reproducible kind of great.


Ingredients to feed 2-3
Half a pack of sausages - I was lucky and had 8 chipolatas which felt less stingy when serving
1 onion
1 pack of mushrooms
Half a can of cider - Strongbow courtesy of the 24 hour shop

Method
1. Chop the onions roughly and put them in a casserole dish with the sausages and a glug of oil and bung in the oven on the highest setting.
2. Poke the sausages and onions every 5-10 minutes so they don't stick.
3. When everything is going brown and caramlised roughly chop and add the mushrooms. Give it all a good stir in so that the mushrooms pick up on the flavour from the sausages.
4. Put back in the oven for 5-10 minutes until the mushrooms are starting to cook nicely.
5. Add the cider, salt and pepper and cook for a final 15-20 minutes

While this would be great with mustard mash we had it with roasted mini potatoes discovered in the back of the cupboard. Flippin' marvelous.

Friday 4 October 2013

Post holiday efficiency

I've been on happy holiday. Yorkshire, as you ask, fish & chips, fat rascals, a splendid game pie, some unexpectedly good museums in the middle of nowhere and lots of good luck with weather. We need not mention the hair raising trip over the Pennines in the fog, in the dark, in my very old ford fiesta....


Returning home has mixed feeling for me. On the one hand the thought of my own bed, my own stuff (missed my non stick pans in our self catering cottage) and just getting home is a truly delightful thought. On the other hand I am always convinced that the swag carrying burglars with ladders have swooped in the moment the car left the road. I know, I know! But I genuinely do feel slightly sick at the possibility of it every time I go away for a bit.

The other thing about getting home after a break is that my productivity improves. All those little jobs get done remarkably quickly. One non-boring job was to finish making a birthday money purchase. I had been lusting for a while over Sarah Young's  tea towel animals. For a start they are tea towels which can be made into an animal cushion, or not. Then they are just fun and unexpectedly intricate designs. Useful and amusing! Having narrowed the designs down to the fox or the lion I realised that I couldn't choose and I had to have both.

Thus the fox was made very speedily into a cushion. Ahem....his name is supposed to be Felix but we called him Stuart. He is slightly scary with his unrelenting stare.


Then life and holiday took over and the lion was left sewn but sadly unstuffed. Guilt prompted me to put him together on our last day off. With the addition of some fish tank stones at the bottom he is now happily propping open the door of the spare 'oom.


Wednesday 11 September 2013

Tah Dah!

Ladies and gentlemen I present to you the newly recovered 99p chair.


Just so you don't have to go scrabbling around this is what it looks like before.


It isn't perfect but I do think it is a pretty good first attempt at upholstery.

I am not going to go into how I did it as I would look a fool and there are hundreds of descriptions on more accomplished blogs out there. Suffice to say these things I learnt along the way.

1. Your hands will hurt and look pretty ugly during the process. I am not a hands and nails kind of girl at all but they did look pretty dreadful. Nail and staple scratches are not pretty.

2. Take your time and take photos as you remove the old fabric. (This works better if you don't have your phone stolen with the photos on it.)

3. Label and number the pieces of fabric as they come off. You want to put them back in reverse order.

4. Iron the old fabric and lay it out on the floor so you can work out how much fabric you need. (This is revolting but essential.)

5. Decide whether the last person who covered the chair knew what they were doing. If yes follow them if no follow them and use your commonsense to make adjustments. There are at least two parts that I really wish I'd done this.

6. You will use a lot of staples.

7. GO SLOWLY! Tack each piece of fabric in place with a few staples and check it is right before properly stapling it in place. It is a pain to take out 30 staples just because it all needs to shift 1cm to the right.

8. Doing your own upholstering is cheaper than hiring a professional but it is not really cheap. Yes you may well get the chair for a bargain  but upholstery fabric is expensive and your will need more than you imagine. I did splash out on Jorja Wilkinson fabric because I have been yearning to used her denim owl fabric for ages and as the chair had cost so little I felt I could justify it. This place will help keep fabric costs down: www.curtainfactoryoutlet.co.uk/

9. It may well be worth giving the chair a bit of new padding. Ebay has loads of cheap sheet wadding. This also has the advantage of being fire retardant so will give you peace of mind. I didn't want to attempt removing all the old padding and springs as I know my limits and it was all in good condition. However giving it a covering of wadding freshened the whole thing up.

10. It is really addictive. "I'll just do this little bit and then I'll stop. Oooh! Look how nice it looks. I'll just do that little bit......Ooooh! Look! It's starting to look like an actual CHAIR and it's 1am and the neighbours are getting annoyed at the sound of the staple gun........"

11. A pair of long nose pliers are very handy as you tug the fabric through the slots in the frame.

12. I have a very patient Matey who came and said nice things every single time I called him upstairs to show him the new bit I'd just done. He also managed to not point out that I looked crazy as I stood looking at it with what can only described as a  bear stare while saying absently that I'd come to bed in a minute.

Friday 6 September 2013

Chicken, mushroom and white wine risotto

I used to hate risotto. Every time it was claggy and sticky and I just did not like it one bit. Until several years ago I went to a dinner party only to discover that a prawn risotto was the main dish of the day. "Smile and eat it." I said to myself. It was fabulous. Mentioning my surprise to the chef he pointed out that most risottos in restaurants have been hanging around for a bit so go gungy. His was out of the pan onto the plate, onto the table and eaten with no time to go bad. A revelation!

I still thought that there was no way I could do it at home until I had a very yummy one earlier this year at the in-laws which inspired me to have a go. Several edible but not so great risottos followed until this one which I can honestly say is easy, yummy and can be made out of leftovers.


Ingredients for 2-3 people
Risotto rice - 1 handful per person plus one extra for seconds.
Chopped left over chicken (or cooked chicken thighs, one per person)
1-4 cloves of garlic (I like garlic but am aware not everybody does!)
1 Chopped onion
100g mushrooms - I go for chestnut mushrooms.
1 mug of white wine - You can of course leave this out and replace it with more stock.
2 mugs of water with 1 chicken stock cube - I find oxo cubes work best for this. Clearly if you have proper stock this is better.
50g Parmesan
Seasoning

Method
1. Fry the mushrooms till they browned and put aside with the  chicken
2. Get the pan nice and hot with  a drizzle of oil and fry the onion and garlic until softening then add the rice.
3. Reduce the heat and put about a ladleful of the stock and white wine into the pan. Keep stirring until the liquid is mainly gone, add another drizzle and repeat.
4. When the rice is close to being ready add seasoning and stir the mushrooms and chicken in. Keeping cooking until the rice is soft and ready to eat. You may need to add more water.
5. Before serving stir in the Parmesan.

Authentic it is not, yummy it is. Last night I could have twice as much but it was all gone.

Monday 2 September 2013

I'm back to normal finally.

Don't tell me! I know that you were on the edge of your seat wondering where I was and what I was up to. Phoning insurance people mainly. The banks sorted out replacements in a matter of days. The insurance lot however agreed it all pretty quickly but three weeks later I have only just got a replacement phone have had one small payment but am still waiting for the main cheque for the rest of it. The insurance people must be sick of my voice as I took to phoning them daily for a bit of a chivvy up. However this is somewhat depressing as it means that three weeks is positively speedy in their world.

No means of taking the odd snap means that blog posts get very tedious. I would be the first to say my photos are rubbish but I do at least try to ensure that they show the object in question thereby clarifying what I've been wittering about and possibly negating the need to read all the nonsense.

While I have been very good about waiting to get the cheque to replace stuff but with replacement cards arriving I did crack within a few days and got a purse. I tried to hold out before buying a bag but after two weeks it was driving me mad carrying my bits around in an increasingly grubby Daunt Books bag. At my Matey's suggestion I went for a satchel so I could have it on me when cycling but still retain a modicum of style.

Now don't tell me that satchels are boringly ubiquitous. I KNOW! I actually wanted one way before the current trend started but had a really lovely bag so couldn't justify it. I have slightly skirted around the trend by going for for a small 11 inch satchel which does not have the 'school' name plaque at the front. It also ensures that will carry the things I need instead of the entire world in my bag.

So here it is. From the Leather Satchel Company. A British manufacturer which has been making these things since the 60s. Their bags come with a 5 year guarantee and is totally customiseable. (Beat that "we don't do custom orders and are more expensive" Cambridge Satchel company)


Any gripes? Only one very minor one. I asked for a few extra holes in the strap. As a shorty I always end up hammering nails into shoulder straps to get them to the right length. The person who added the extra holes seems to have got a little carried away. It looks a bit odd to me but I'm sure I won't notice it at all in few weeks time. I should add that I never like new bags when I first have them. Even if I have chosen them, spending weeks, months even, deciding on the poor thing. Yes I am that fussy. This bag looks far too new at the moment and I can't wait for it to get properly bashed about and develop some character.

I do fear however that on my dutch bike with my shiny gold helmet and red satchel I look somewhat irritating. At least I'm not wearing a cape...until the fabulous 60's navy blue one I've just ordered from Etsy arrives...

Thursday 15 August 2013

A bit of deviation

I don't intend to scribble down bad things in this blog because that just isn't the point of it. (I'll admit I'm not 100% sure what the point is yet other than giving me a bit of a creative kick up the bum.) I think there are enough bad things in the world without me wittering on about the bad things in my life. However I'm going to make an exception this time as I think there is lesson to be learnt and I'll try to keep it brief.

My bag was snatched at the weekend. Yes, yes I live in London, it happens all the time, I should have been more careful. Hold on. I was actually moving and had my eye on my bag. I was cycling home when two lads on a moped went past me and lifted the bag from my basket. Literally the guy at the back put out his hand and took it before they sped off. I was 100 metres from my front door.

Now before we go into too much doom and gloom I was lucky enough to have a kind couple see the whole thing. They took me in for a cup of tea and called the police. Faith in humanity was put back in balance.

I'm not going to bring out the violins by go into what I lost. It was everything. Several nice things that were presents and a number of things I never usually have with me. The thieves had a good win but it is covered by insurance and at the end of the day it is just stuff. But I learnt these things:

1. Just because I am moving at a passable pace does not mean I'm safe. Bit of a shock that one. I assumed that if somebody took a chance it would be when I was stationary.

2. I usually hook the strap of my bag around my handle bars in case somebody takes a chance. The police told me that it was a bad idea because the thieves will get angry, will keep tugging and the chances of being hurt are high.

3. The police told me that muggings are on the decrease while snatch and runs are on the increase as the effort is much less and the chances of being identified are low.

4. Check your bag is covered by your household insurance. It probably is but worth a phone call before anything happens.

5. Keep your keys separate. Luckily mine were in the bottom of the basket. The last thing you need having just been robbed is to have to change your locks as well. I would add that keeping your phone separately is a good idea as well. I couldn't remember my Matey's number and couldn't start cancelling cards until I had got home.

6. Set up the 'Find your ipad/iphone' app on your phone and computer. By the time I had worked out what to do and downloaded it the ipad had been locked and wiped so untraceable. The faster you can get onto the system the more chance the police have of tracking them down.

I would add that the police were great, realistic that I won't get the stuff back but ensured that I had everything I needed to make an insurance claim. They also made it clear that it wasn't my fault and I wasn't a fool for having my stuff with me.

Of course I can't claim to be unaffected by it all. I resent having lost the presents people have been kind enough to buy me as the new items won't have the same emotions attached. It's horrible costing these things up to make an accurate claim.

Oh and the stupid thing that really annoyed me at the time was the loss of the new staple gun that had just arrived. I had planned to tackle upholstering the chair at the weekend but have had to order another. Would have quite liked to see the robbers faces when they saw that.

Friday 2 August 2013

I'm still here!

Just awfully busy with a lot of projects in the mid way stage. This has the unpleasant effect of leaving the house look a tip and not much to write about. I don't think it is especially interesting to read about and look at pictures of things which still look a bit rubbish.

So in stasis at the moment we have:

The spare 'oom project
Shelves to put up to cover pipes - waiting till I visit my Mum so I can borrow her jigsaw. I could buy one but it seems silly for three cuts.
Hunting for a carpet remnant to replace the truly vile stained matting. - This make take longer than I want as I had no idea how expensive carpet is. Fortunately we have a lovely blue rug which hides most of it.
Bookshelves to find and put up - again waiting to visit Mum to see if she still has my old 'precious shelves' (So called because they held my precious things.) which would do nicely.
Armchair to recover - Doing well on this one. The chair has been stripped as far as possible and I am just waiting on a sample of fabric before making the next move. Sod it! Here are some really bad mid way pics to enliven your day!


I decided to follow what the previous upholsterer did and left some of the original fabric in place. They probably had a good reason. The legs have been sanded down and polished up. I thought this would be a five minute job. Two hours later I was getting there. They have come up a lovely honey colour though which will work well with the blue fabric I am almost certainly going to use.

The new range project
Top secret at the moment but is taking up a lot of time. Rather exciting though and I have discovered a new skill. Gilding. I swear I would cover the whole house in gold leaf if it would come across as a ostentatious.

Oh and I'm making a super hero cape for a 4 year old. Quite fancy one myself. If I were a superhero what would my superpower be?

Thursday 25 July 2013

Possibly biting off more than I can chew

Having finally come up with an idea to make it work we started tackling the spare 'oom the other day. More specifics at a later date as it is in a bit of a mid way phase at the moment. One of the biggest changes I came up with to get rid of the wardrobe (guests only need a hook on the back of the door really)  and put a nice comfy chair with some books in the newly created space.

Hunting down the perfect armchair  proved out of our budget. "I know!" I thought merrily. "I'll just buy a lovely old chair and re-upholster it. I've looked online. It looks easy."

This was how we ended up with this:


At 99p on eBay this fitted into our budget. Just got to re-cover it now...it is easy isn't it? I have an armchair to re-cover, a load of online lessons and a rather optimistic amount of willpower.

Tuesday 16 July 2013

Tackling the cutlery drawer conversion project

Having been foolish enough to go to a boot fair just before going on holiday and lugged back a project to do I resolved that it was time to tackle it. Quite apart from anything else it was making the place look untidy. Few things look worse than a half done DIY project.

So! Sanding first. The intent was to just take the top layer of grime off with a fine grade sandpaper so I could keep the patina. Unfortunately the gunge left on the drawers from the weird fake wood plastic veneer meant that I had no choice but to go for a proper sanding job. I was less hardcore on the rest of the chest but needed to take enough layers off to make the colour of the wood blend together nicely.

Sanding done it was time for the magic that is Briwax to go on. Ooh it came up luvverly!


However the insides of the drawers were still a bit of a mess. The glue that held the fitted interior was tough and was not budging. After several hours of scraping and sanding I accepted that the bottom of the drawers were never going to look great and I was better off giving them a pretty lining and hiding the mess.
 

 But what lining? Oh so many choices of lovely wrapping paper, some astonishingly expensive. In the end I went for this one from Judd street Papers. I thought the 30's feel would work well with style of the drawers and the yellow would blend nicely with the colour of the oak.


At £2.20 per sheet it was a little more expensive than I wanted but as the drawers only cost £7.50 I thought I could stretch to it. (This got slight more expensive when I realised I had stuck one sheet the wrong way up.)


I was going to show you this 'bloggified' photo pretending that my life is fabulously stylish.


In reality though the printer has to sit on top of the drawers as there is nowhere else for it to go and artfully placed bits and bobs would drive me mad every time I used the printer or opened the drawers. So instead here is how it has improved life in a very ugly corner.


I am truly thrilled to have got all those papers hidden away. I do not claim to be a neatness obsessive but surface level tidy makes me feel very happy. Just don't open the drawers.....

Being brutally honest I  am 50/50 about the success of this. I am really pleased with how the outside has come up but the insides of the drawers are less than perfect. I just couldn't stop the paper from going crinkly from the PVA glue. It didn't matter whether I left the glue to get tacky, put a thick coat or a thin coat. Solutions on a postcard please. Fortunately the drawers are pretty full already so nobody will see much wrinkle.

Monday 8 July 2013

Pepper, onion and goats cheese tart

On a gloriously hot weekend with the in-laws in town what else could we do but have a picnic in the park. Aside from the aforementioned picnic blanket, we packed: lemonadesmokedsalmonandcreamcheesesandwichesstrawberriessaladwhitewinesconesclottedcreamjamanda pepperonionandgoatscheesetart.

If I say so myself the pepper, onion and goats cheese tart was a thrown together marvel. I will admit that I attempted to make Delia's Flaky Pastry but messed it up by using bread flour. (It's not the same as plain flour which I knew but did it anyway.)


Ingredients
Two peppers - I went for one red and one yellow
4 onions - I used white but red onions would also work
Teaspoon of sugar
125g Goats cheese
Puff pastry - ready made due to to flaky pastry disaster!
Salt and pepper

Method
1. Chop the peppers into long strips and put in the oven on a high heat with a drizzle of oil and balsamic. Cook till soft and put aside to cool.
2. Caramelise the onions. Peel and roughly slice the onions and place in a nonstick saucepan on a low heat with a drizzle of oil. Put a lid on the saucepan and keep an eye on them from time to time giving it all a bit of a stir. When the onions are very soft and brown indeed, practically mush, add a teaspoon of sugar and stir gently till it is dissolved. Leave to cool.

Top Tip: Do these two stages the night before while cooking dinner.

3. Preheat the oven to 200C. Take your sheet of pastry and decide what shape you want  the tart to be. I wanted a round one so used a loose bottomed flan tin as a cutter. Grease the tin or tray you are going to cook it in and put the pastry in.
4. Spread the onions onto the pastry then put the peppers on top, sprinkle the goats cheese all over with a bit of seasoning. When adding the topping leave a 1.5cm ring of pastry at edges which can be brushed with egg to give a finished look.
5. Put in the oven for 15-20 minutes till golden brown.

I left the tart in the flan tin to keep it all together in transit. Served with plenty of sun and lemonade it would be hard to be more summery.

Friday 5 July 2013

Mint and Wasabi Potato Salad

Back in days of yore I was an actor. In one, rather good, production we had an actors nightmare of dinner on stage. Eating on stage is no fun at all. The challenge is attempting to look natural while also trying to avoid having a mouthful of food at the same time as a line. Oh and just to make life fun you will have a maximum of five minutes in which to eat the full meal and you do have to eat enough to look like you meant it. Oh and you rarely get food to practice with until the dress rehearsal.

This particular play had dinner in the pre-interval scene. Our lovely stage manger provided this potato salad for us to eat. It was so good that all the actors would wait in the wings listening for the audience to be ushered out before descending on the table to polish off the remains in a frankly unladylike manner.

Having got the recipe out of the stage manager this is a staple for just about every party I hold. Incredibly easy and quick to make with just a very little kick from the wasabi.


Ingredients
Potatoes! I like to use really small baby new potatoes so I don't have to chop them in half. As the photo indicates this rarely happens.
Mayonnaise
Chopped mint
Wasabi
Salt and pepper

Method
1. Boil the potatoes till they are cooked and leave to cool.

Top Tip: Wait till they are really cool. The mayonnaise goes a bit weird if the potatoes are warm. You can speed the process up a bit by running the cold tap over them.

2. Put a dollop of mayonnaise and a small squeeze of wasabi in with the potatoes and mix it in gently with your hand. You are aiming for a light coverage. Have a taste to see if it needs more wasabi and add if needed/wanted.
3. Add the chopped mint, salt and pepper and mix in thoroughly.

Put in a pretty bowl and wash your mayonnaisey hands.

Thursday 4 July 2013

Is there a perfect bicycle out there?

The short answer is no! However this does not stop me trying to find one. I have just been forced to admit that my Dawes Diploma bike has got to the point that to fix all the minor issues (myself) will cost more than getting a less beaten up secondhand model. It was in such a bad way that I worked out I would save more money by dissecting it for the handy bits than trying to sell it at a whole.

So what do I really need in a bicycle? I cycle to and fro from work and when it is just too lazy to take the car. For me it's primarily about saving pennies on public transport. This is not to say that I don't like the exercise and the thinking time it gives me for an hour and half each day. Suffice to say that am not looking for a 'cyclists' bike.

I like an old fashioned Sit up and Beg bike. Yes this partly aesthetics and a vague sense of being Miss Marple. However my main argument for the sit up and beg cycle is the posture. We spend hours each day hunched over computers, mobiles, ipads, books. Looking down is becoming so ubiquitous that we are all at risk of being permanently hunched over in old age. Having a bike that forces you to look up and sit up goes a little way to counteracting this.

Margaret is being silly here and has her handlebars too low.

I like a basic bike. I'm quite a handy person so want to be able to fix my bike when it goes wrong. Too many frivolous bits and bobs and I'll have to pay somebody to sort it out.

I like a big bike. I know this is flying against the trend for nifty light bikes but I would argue that a big heavy bike is great for two reasons.
1. It makes the cyclist larger and more visible to cars. I like being seen.
2. It makes the cyclist work harder. As this is my main form of exercise I consider this to be a good thing.

You are probably assuming that I have bought a pretty Pashley. They are great bikes and I did have a 2nd hand one once but they became fashionable and it became the only bike I have ever had nicked. So I like a cheap bike. My old Dawes cycle was a rarity in that I bought it brand new. Having spent £350 I then had to spend another £50 on insuring the thing. (I also never really liked it. Not sure why; it just didn't feel right.) A decent 2nd hand bike is the way forward.

This time I have gone for a second hand Dutchie. It is VAST! At least a foot longer than the Dawes. It's rather like the cycling equivalent of  a black cab. Nice and basic to fix and aesthetically fabulous. A bit too continental for Miss. Marple but rather chic nonetheless. (I should add that I always wear a helmet. Aesthetics are great but being alive with all my bits in place is better.)


So is it perfect? Of course not! It is pretty good though.

Friday 28 June 2013

With a twist

I only ever make cakes when there is a purpose behind it. It doesn't need to be a big reason, having a cuppa with a friend is as good as any.  Half the point of making a cake is it's sharing qualities. Also I can't be sitting at home scoffing cake all day. However with a surfeit of citrus fruit in the house last night a lemon cake was made with reason behind it!


With a twist.... two lemons and two limes. The zest went into the cake as usual. Cake baked, time for a really sharp topping. The juice of the fruit went into a saucepan with four tablespoons of limoncello.  Limoncello does have a lot of sugar in it already but I would say that my taste does veer toward the tart side so you may want to add a little sugar. This was then reduced down to about two tablespoons worth and poured over the cake..

Top Tip: Put the cake back in the cake tin when pouring the topping over it. This makes the cake gorgeously moist and stops the topping going everywhere except on the cake.

It takes about half an hour for the topping to sink into the cake and set a little. The result is a gloriously sharp topping which is smoothed out by the sweetness of the cake.

Thursday 27 June 2013

A patchwork quilt perfect to picnic on.


Having had a frankly vicious clear out of my wardrobe recently I had a red corduroy skirt and a very cute red white and blue dress that really were past their best. No chance on eBay and just rude to give to charity shops. Only one thing to do and that was to chop them up and attempt to make a patchwork quilt which would be large enough to cuddle under in the winter but small enough to lug around for a picnic blanket. I do like a multi-purpose project.

Through trial and error I finally think I may have some handy hints on the whole patchwork quilt thing that may not be 'correct' but I find have resulted in a reasonably competent result fairly quickly. So here goes.

Equipment

Fabric
Paper
Pins
Fabric scissors
Thread
Sewing machine
Padding or batting

Top Tip: I like to use old blankets for the padding. Cheaper than proper batting and stops the blankets going into landfill. Just run them through the washing machine to get rid of any moth or other nasties. 

Method - Time taken: It depends on the size but I reckon that it was about a 20 hour job spread over a number of evenings.

1. Decide how big you want your squares. To state the bloomin' obvious the larger the square the faster the project. I went for 21x21cm. Cut out your template. (Although there are 'proper' papers out there I always end up using paper swiped from my printer.)

2. Start cutting squares of fabric. Put a good film on the TV as this can get tedious.

Top Tip: Don't be tempted to cut more than one patch at a time. I find that one always ends up wonky.

3. Take your padding and lay it out on the floor  "What?" I hear you say! "Bit early for all that, isn't it?" The one thing that was driving me mad in the past was laying out the squares on the carpet to play with layout and then messing it all up as I forget what when where. SO! Lay out your padding and start playing with how you want it to look. When you are happy with it all pin the squares to the padding so that you don't lose the pattern if you can't do the whole lot in one sitting.


 This also means that you can fold the whole lot up and put it away. If like me you don't have enough fabric so need to hunt down a few more bits you can see where the gaps are and can come back to it later.

4. Squares all laid out. (I did a few mini squares to add some variation and use up some tiny bits of fabric.) Time to start stitching. This is the tricky part as the goal is to make it all match up like this:


This is the one part that even really experienced quilters (and I am really, really not including myself there) find a pain so give yourself a break and don't get too cross if it doesn't quite work every single time.

Top Tip: Put a bit of masking tape on your sewing machine to help you keep the same distance on every single square.


5. Once all the squares are nicely ironed strips pin two strips together face to face and sew together. Iron and keep adding strips.


6. Top of the quilt is done. Have a cuppa and congratulate yourself.


7. Pin the patchwork to the padding and trim the padding to fit it. (I suggest going over the edges by an inch at this stage.) Then spread out the bottom fabric and put it on top of the patchwork with the right sides together. Keep spreading and fiddling until it is all smooth and straight.

8  Pin like crazy. The more pins you use the less likelihood of slippage. It is worth pinning the three layers of fabric like this:


It is a pain to do but it stops slippage. (You can buy a walking foot for your sewing machine to help solve this problem but at £30 they are expensive unless you plan to make a lot of quilts.)

Sew the three layers together around around the outside. Leave an good sized hole in one of the sides to turn the whole lot inside out.

Top Tip: Ensure you have loads of cotton on your bobbin. Few things are more annoying than getting to the end of a seam and discovering that it is only half done because the cotton has run out.

9. Now cut away the excess padding as close to the seams as you can while leaving enough to hold it in place. Small scissors make this easier. Snip all three layers diagonally across the corners close to the seam to help the corners look pointy.


10. Turn it inside out and press the edges with a hot iron with plenty of steam. The aim is to get the edges to look neat and flat.

11. Sew up the hole in the side.

12. You are done! If you want to add some quilty definition you can. I machine sewed around the smaller blocks in the middle to pick out the pattern a little.


Top Tip: If the bottom fabric is a different colour to the top use a different coloured thread in the bobbin so that the stitching is more discreet.


Have a picnic in the park. Or if the weather isn't going your way have an indoor picnic. I would seriously recommend an indoor picnic. It feels like being a child again with a tent made out of blankets.
Related Posts Plugin for WordPress, Blogger...
UA-38463267-1