Thursday, 14 March 2013

My new bits and bobs box restoration- Part 4 Upholstering

One of the things that attracted me to this box in the first place was the padded top. I like things to have more than one purpose.

So having cleaned, scrubbed, painted and waxed this box into a rather handy thing to have around I had to tackle upholstery. I am no upholsterer. But I have nailed fabric to wood with a bit of padding before so I was determined to make it work this time.

As a technique this was successful if not correct. More importantly it was easy and I was able to do it with no help.

Cut out your fabric so that you have a margin of just over the depth of the foam (loads of places on ebay to get pre-cut foam). Fold the edge of the fabric over and iron it flat. This will help you get  neat edge.


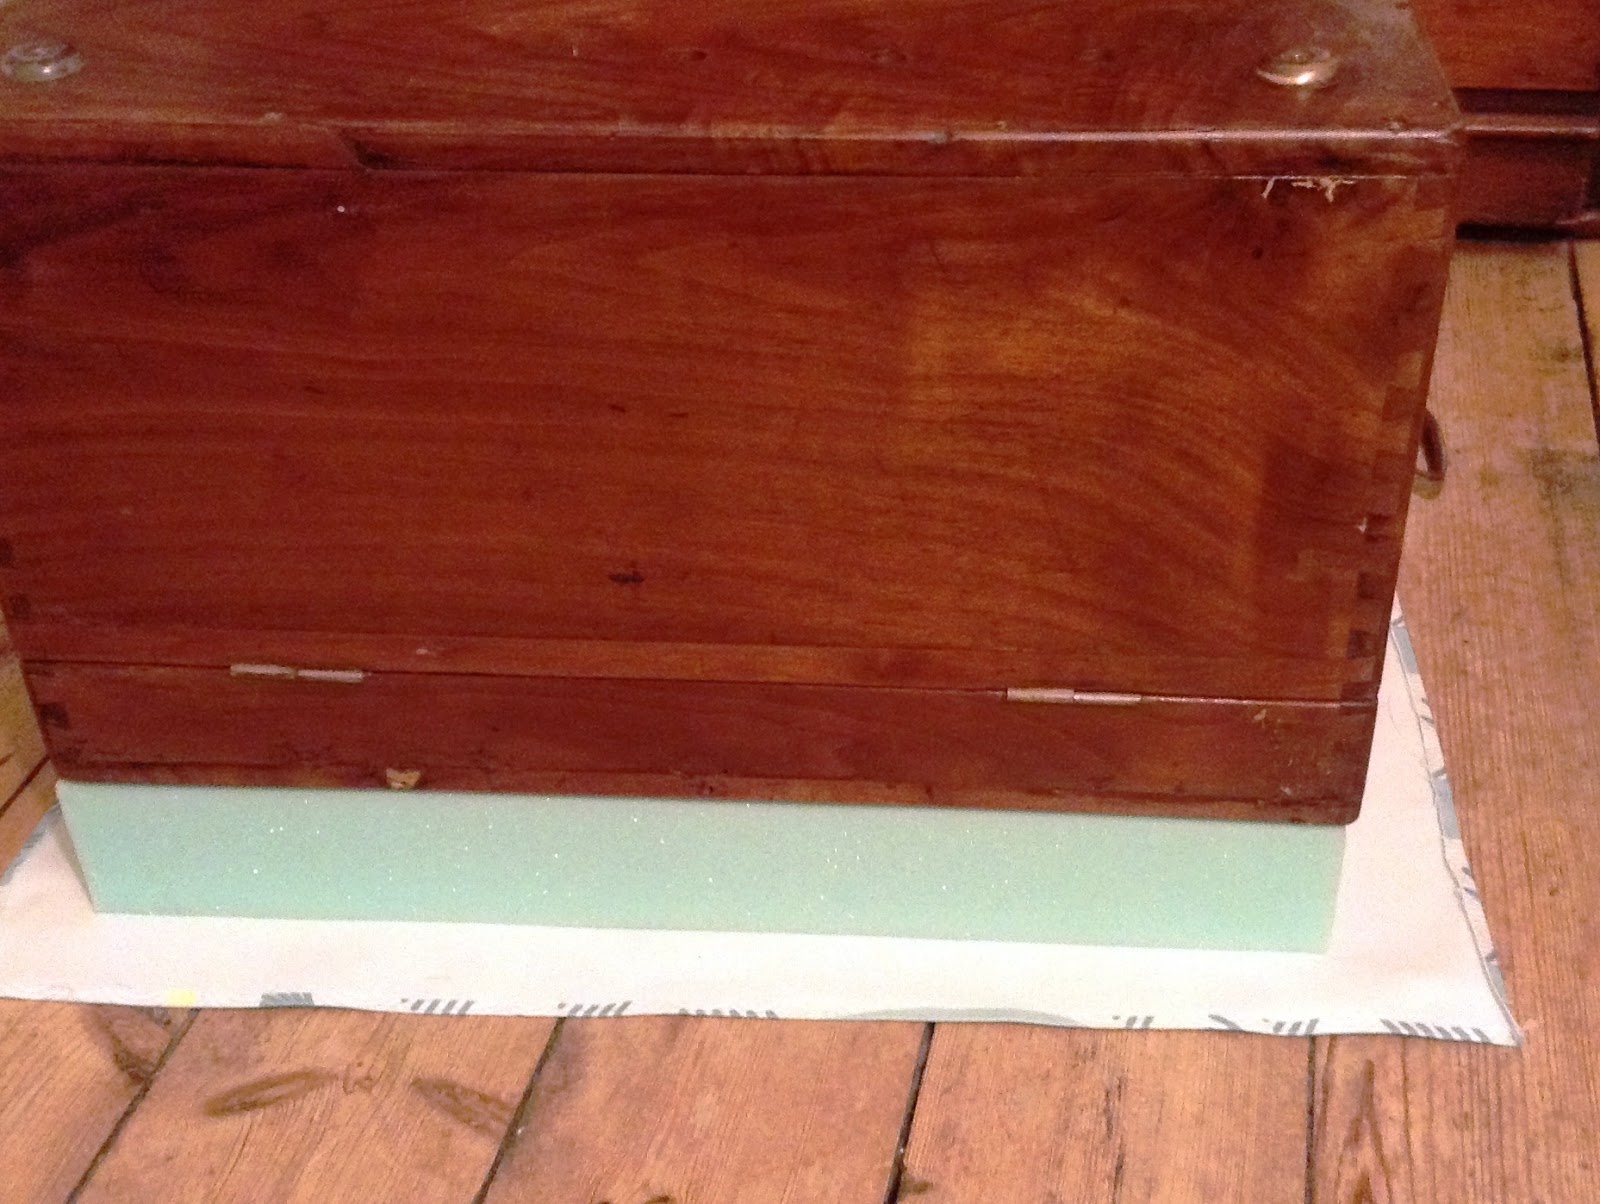
 At this stage it feel like you haven't cut the fabric big enough. Don't worry! Place the box (or whatever it is you are covering) upside down on top of the foam:


 (At this point you really will be losing faith in the size of the fabric. Trust me!)

With care kneel on top the the box so that you can push down the foam just enough to nail one upholstery pin in into the centre of each side.


(Yes you will be looking daft right now as your bum will be in the air and your face will be getting slightly red from being upside down.)

Put another 2 pins in on each side to get the fabric evenly stretched:


 Start hammering pins in all round the fabric. I find it easier now to right the box up and gently push down on the fabric covered foam till it is in the right place:


 Top Tip: If you are using a fabric that has a right way up do make sure that you have the correct way for the furniture....Ahem I may not have done this:


 I had to unpick everything and go back to the start so things were not as neat as they would have been.

Anyway once you have got everything pinned in place it's time to tackle the corners. They are not as tricky as they seem.


Take one of the sides of fabric, fold it over the edge and snip it about 2 cm in from the edge:


On the other side of the flap cut a corresponding snip and remove the small square of fabric:


Hold the first fold down and carefully fold the second part over to make a nice tight fold and pin. It is worth not hammering it in too far so that you can fiddle with it a bit to make it neat.


Once you are happy you can finish it all off:


Do the other three corners.

Top Tip: It is neater to fold the same way each time. I had the fabric from the short edges of the box fold inward first followed by the long edges.

After a month we finally have a fully restored box. Hooray! Time for some before and after shots....


I was going to take some snaps of the inside empty and pristine but who am I kidding? This is as tidy as it will ever be. It is a working box you know.

Wednesday, 13 March 2013

Paprika potato wedges...or posh chips.

What is there not to love about a potato?The list of things you can do with them is seeming endless. Last night I decided I was sick of the jacket, the mash and the new potato and made paprika potato wedges. Actually they were closer to chips as we were hungry and I wanted to get them cooked as fast as possible.


Ingredients
Potatoes! (I try to use the annoying sized ones you get in a bag of spuds.)
Paprika
Olive oil
Salt and pepper

Method
1. Turn the oven up as high as it will go.
2. Chop the potatoes into wedges, or chips if you want to speed things up a bit.
3. Plonk them onto a baking tray and sprinkle with paprika. This really is a personal taste thing but enough for a pleasant coverage. Throw a slug of oil in, just enough to cover the wedges and stop them sticking. Season with salt and pepper.
3. Get your hands messy and make sure that the wedges are nicely covered in the oily paprika.
4. Put in the top of the oven for 30-45. (This depends on the size of the wedges.) Give them the odd shake and turn them over with a fish slice occasionally. It helps the crispness develop. When they sound crunchy when you shake them in the tray they are ready.

Eat with plenty of green salad and a dollop of mayonnaise.

Other variations include:

Just plain chips cooked with a bit of oil and seasoning
Rosemary and sea salt
Parsnips, sweet potato and normal potato
Have a rummage in the spices part of you cupboard and make something up!

Tuesday, 12 March 2013

Restoring a leather sofa

Our old green sofabed has been looking a bit sad while. Despite cheerful blankets draped over the back and slightly bonkers cushions nothing was hiding the fact that it was just a bit tired. The snag is that a new one ain't cheap.

Eyes peeled for a bargain then....On the way home from work one Friday I decided to take a mini detour via Criterion Auctions. It's a good place for a bit of a rummage. I usually find loads of things I would love to buy but sense prevails when I remember that I have nowhere to put them. This time I spotted a small dark brown leather sofa. Not in great condition but nothing that a bit of TLC wouldn't fix. A little more investigating revealed that it was originally from the Conran shop. This was a bit of furniture that somebody had probably spent a good few grand on. Well worth putting a bit of effort into restoring.


The next day my matey and I went for another look with the practical hats on and wielding a tape measure. Now here is the thing. Being sensible we needed another sofabed. In a small house,even with a spare 'oom, having an extra bed is handy. But we really, really liked it and the old sofabed really, really was looking dreadful. In the end we agreed to put a very cheeky bid on and see what happened.

To cut a long story short. We won! The auctioneers pointed us in the direction of a nice chap who would deliver it and it was with us by 7am the next morning. All for just over £100.

In-situ it looked better than I imagined.  The dust had been blown off in the move. The feather cushions had been plumped up so they looked a hundred times better. In proper light I could see that the leather is a really lovely dark brown, worn in places but nothing that wasn't fixable. Naturally I spent at least half an hour playing with cushions and blankets and poking and prodding before admitting that I really did need to go to work.

This weekend I knuckled down and started cleaning it and touching up the scuff with this rather good stuff: Liquidleather.com . (Not cheap but it does work well.)  A few hours later and it looked a bit like this.


An awful lot better.  We decided that we liked the slightly battered look so deliberately left some of the worn parts alone. (I suspect some people pay a fortune to have a 'gently worn' look added on!)

Now my only problem is deciding on accessories. We have a rather bonkers collection of cushions which may not be to everybodies taste but we like a cheerfully eclectic mix:


The cats drinking tea and the worried owl cushions are from Lush designs and the fish one Jorja Wilkinson. (It's actually a homemade one make from left over fabric but she does sell cushions as well.)

 The main thing to decide is blanket or no blanket:


Without the blanket it does look more stylish. BUT!


With the blanket it looks cosier.

At the moment the blanket is winning as it is lovely to be able to pull a blanket over yourself if it's feeling a bit nippy. Nothing at all to do with the freezing weather! 

Monday, 11 March 2013

Rhubarb and Ginger crumble

As winter crept back again at the weekend I thought it was time to make my favourite Rhubarb and Ginger crumble. Warming, sweet and tart it really is the perfect its-cold-outside pud.


Ingredients - for 2 people
400g rhubarb
3 x tablespoons water
3 x tablespoons sugar
40g fresh ginger

50g jumbo oats
50g butter
50g brown sugar

Method

1. Chop the rhubarb into pieces around 2cm long and put into a saucepan with the water and sugar. I use vanilla sugar for a bit of extra flavour.

Top Tip: Stick a vanilla pod into a jar of white sugar and within a few weeks you will have Vanilla sugar. The pod will last for ages. Mine is at least 3 years old and still going strong.

2. Grate the ginger and add to the pan. 40g is quite warming so add a bit less if you prefer a subtle flavour. (I don't bother to peel the ginger if it is all going into the pot as you can't see the small amount of peel.)

3. Heat the rhubarb in the pan until it starts to break down and go a bit mushy. Remove from heat and put the rhubarb and ginger into an oven-proof dish.

4. Melt the butter in a pan, add the sugar and oats and mix well.

5. Cover the rhubarb and ginger with the oaty mix. This is a large enough quantity for a good coating of crunchy crumble.

6. Put in the oven on 180C/350F/Gas 4 for 35- 45 minute. When the topping is brown and crunchy and the rhubarb is bubbling away it's ready.

This is pretty good on its own but if you want to gild the lily serve with clotted cream or ice cream.

Top Tip: If you happen to have some flaked almonds add them to the crumble topping for an extra crunch.

Thursday, 7 March 2013

Snowdrops

I work in a rather posh part of town. So much so that I feel that the shops look down on me in my cycling duffle coat having a lunchtime amble.

On the plus side I do get access to a delightful little private garden in the square where the office is. Although still a tad too nippy to sit and have my sarnies it is lovely to have a bit of green to watch the world wake up again. I spotted some Snowdrops today. Got to love the spring time bulbs and their colourful bravery while all the other flowers are still hibernating.


Wednesday, 6 March 2013

Sorting out the bathroom - Part 1

I have a rather lovely rolltop bath which I adore. The few occasions in which I indulge in a bath really are indulgences as it it is larger than normal so perfect for a long hot wallow.

On a day to day basis however a shower suffices. BUT! The flipping shower rail keeps coming down. Yes I have put it up properly. Four times. Each time it slowly comes down over the course of several months. I try to pretend it isn't happening until it gets to the point that I admit that I can put my fingers behind the bracket 'holding' it to the wall.

This time I refused point blank to re-mount the thing again. Fed up, bored, had enough!

It was still falling down. A solution was needed whether I liked it or not. In essence the problem was simple. The rail was too heavy for the fixings so the cantilever effect was dragging it down. It needed another bracket or two to hold the rail to the ceiling. Couldn't find such a thing.

How about a ceiling mounted shower rail? They cost £250. OUCH! Ebay? Price is down to £100. Very  tempting but still not great.

How about finding a metal hoop to attach to ceiling? Apart from expensive hula hoops I couldn't find anything that would work.

Just as I was getting to the point of resorting to string I found these:


Perfect they are not. But at £20 for two more doable than the other options. Figuring that this solution looked a lot better than the current situation of the rail hanging off the wall, and who spends hours staring at shower rails anyway, I went for it.


Ahem! The only thing is that I then got it into my head that it might be a good plan to re-do the bathroom. Having just sold a few bits and bobs on e-bay I had a nice £75 budget to play with and this weekend saw me up a ladder painting the ceiling and the white parts. Already it looks a whole lot brighter and cleaner.

The next stage is choosing colour. It has always been a vibrant marine blue which I rather like but perhaps it's time for a change? So I've just had some testers sent from Dulux. (£1 for 3 on their website, much cheaper than going to a shop.)


Love this stage. It's the naughtiness of painting and scribbling on the wall.

I should add that the weekends industry was fueled by Golden Syrup cake and the paint drying moments were made all the more interesting by episodes of The Good Life.


It may not have been made in my lifetime but it tickles my funny bone.

Tuesday, 5 March 2013

A practically free ribbon pinboard

Technically this is yet another post about the box restoration but I thought it might be getting a bit boring so am treating it separately. Sort of.

I wanted a pinboard inside the lid of the box. Partly to add colour but also to up the practicality of the box. So first step. A bit of wood for the base of the pinboard. Unfortunately our local, and truly amazing, wood shop closed after 70 years due to retirement. They used to cut exactly what I wanted to the perfect size, usually telling me what I needed for the job to get it right. All other places may cut it but charge for a full sheet. I was not going to go for that unnecessarily expensive option.

A week later I still had no solution. I had also realised that the lid is really heavy so adding more wood wasn't going to help much. Eventually I had an idea which would either work or be a total disaster. Using cardboard as a base.

Cut two pieces of cardboard to fit the inside of the box:


Tape them together to make it as sturdy as possible:


Added a small amount of wadding  and cut the fabric (I splashed out and used some of Jorja Wilkinson's Fish fabric) about an inch and a half bigger all round than the base.  

Top tip. I know this is too obvious for words but but do iron the fabric before you use it.


Now for the slightly tricky part for getting the fabric looking right.(I didn't help myself by having a pattern that needed to be straight) Start by taping the fabric into place temporarily, this way you can change things easily if they are wrong.


Having got the fabric into roughly the right place put 3 staples in each edge to hold it in place. (This was thin enough to use a normal stapler. A staple gun would be easier though.) A gentle tug on the fabric helps  to hold it in place make it all nice and tight. Don't pull too hard though as the cardboard will buckle.

Once the fabric is in place staple like mad around the edges till there is no way anything will budge!

Time to tackle the corners. A couple of extra hands is good for this:


Start by snipping the excess fabric. (It's better to trim a few times to get it right than to cut too much off!):


Hold the corner part of the fabric down (see below) and staple it in place:


Take one of the two flap of fabric you will now have and fold it down. One will lay flatter than the other so use that one:


Staple!

Take the other flap of fabric and fold it into place:


Staple!


Snip off any excess fabric and you are getting there! Actually you could stop at this point as it is already a very pretty and functional pinboard.

Time to attach the ribbon. I went for some dark blue cotton tape and got measuring. This one of those annoying things where it does matter if it's wrong so it's worth laying it out a few times to decide where you want it to go. It is also worth pinning the ribbon to the board to get it properly in place.


Once the ribbons are in place it's time to staple them to the back. Take time over this as it will bug you if it's wrong. Then trim the excess.


The final stage was to attach it to the box lid by using upholstery pins (I happened to have loads of these from an old project.)where the ribbons crossed.


If you are not doing it for a box some drawing pins would work just as well. Also this would look fab put into an old frame to hang on the wall.

All in all not too tricky and the only real expense for me was the fabric which was naughty but worth it and I didn't need that much of it.
Related Posts Plugin for WordPress, Blogger...
UA-38463267-1